Garden Design Course Week Two: Drawing a Scale Plan
This blog post might send some of you to sleep - I admit it’s pretty dull, but it’s the important basics on drawing a site plan. And it was game changing for me and my Mum on our garden projects. So I hope it helps someone out there, whoever you are, someone like me! And you don’t need to be a pro, honest!
I learnt two big things in our second lesson:
1. A scale plan is not just for the Pros. To get the best design, you need a plan on paper which clearly shows all spaces, sizes, shapes, proportions and most important of all - the angles! Never assume a garden has right angles. Turns out that not a single corner of our plot is 90 degrees and I only realised this whilst completing my homework. Does it matter? Sorry to say, but yes it does! If you want to build a square deck like we did, we had to work out the angles to know how to position it and create the illusion of a right angled corner of the garden. It’s so much easier and cheaper, and less grounds for divorce if you do it on paper first.
2. Unless you’re a Pro, loaded with cash, well connected, or can copy or download software for free, the only way to do a site plan is with a pencil and paper. I was convinced I could find some sort of online software or an app for landscape design and wasted hours trying all the free stuff out there. It was all crap, full of bugs with massive limitations and required multiple in-app purchases to release the critical stuff like inserting a fence! Landscaping software is serious stuff - I’m talking £1,000 upwards! So it was a humbling moment agreeing with our teacher that she was right, and we would do our homework by hand.
How to draw a plan (*in a non-patronising way)
1. Roughly sketch the basic lines of your garden and house to collect all your measurements.
A tape measure is never going to cut it here. My longest tape measure is 3m so would never work. With the help of my Mum we used string and pegs to measure every part of the garden. We put markers on the string at 50cm intervals so all we actually had to measure (with my crappy 3m tape measure) was the final stretch of string after the last 50cm marker. Simple! You could of course easily buy a 50m Surveyors tape measure off Amazon, but I’m all about DIY and saving money, and I was too inpatient to wait for it to be delivered.
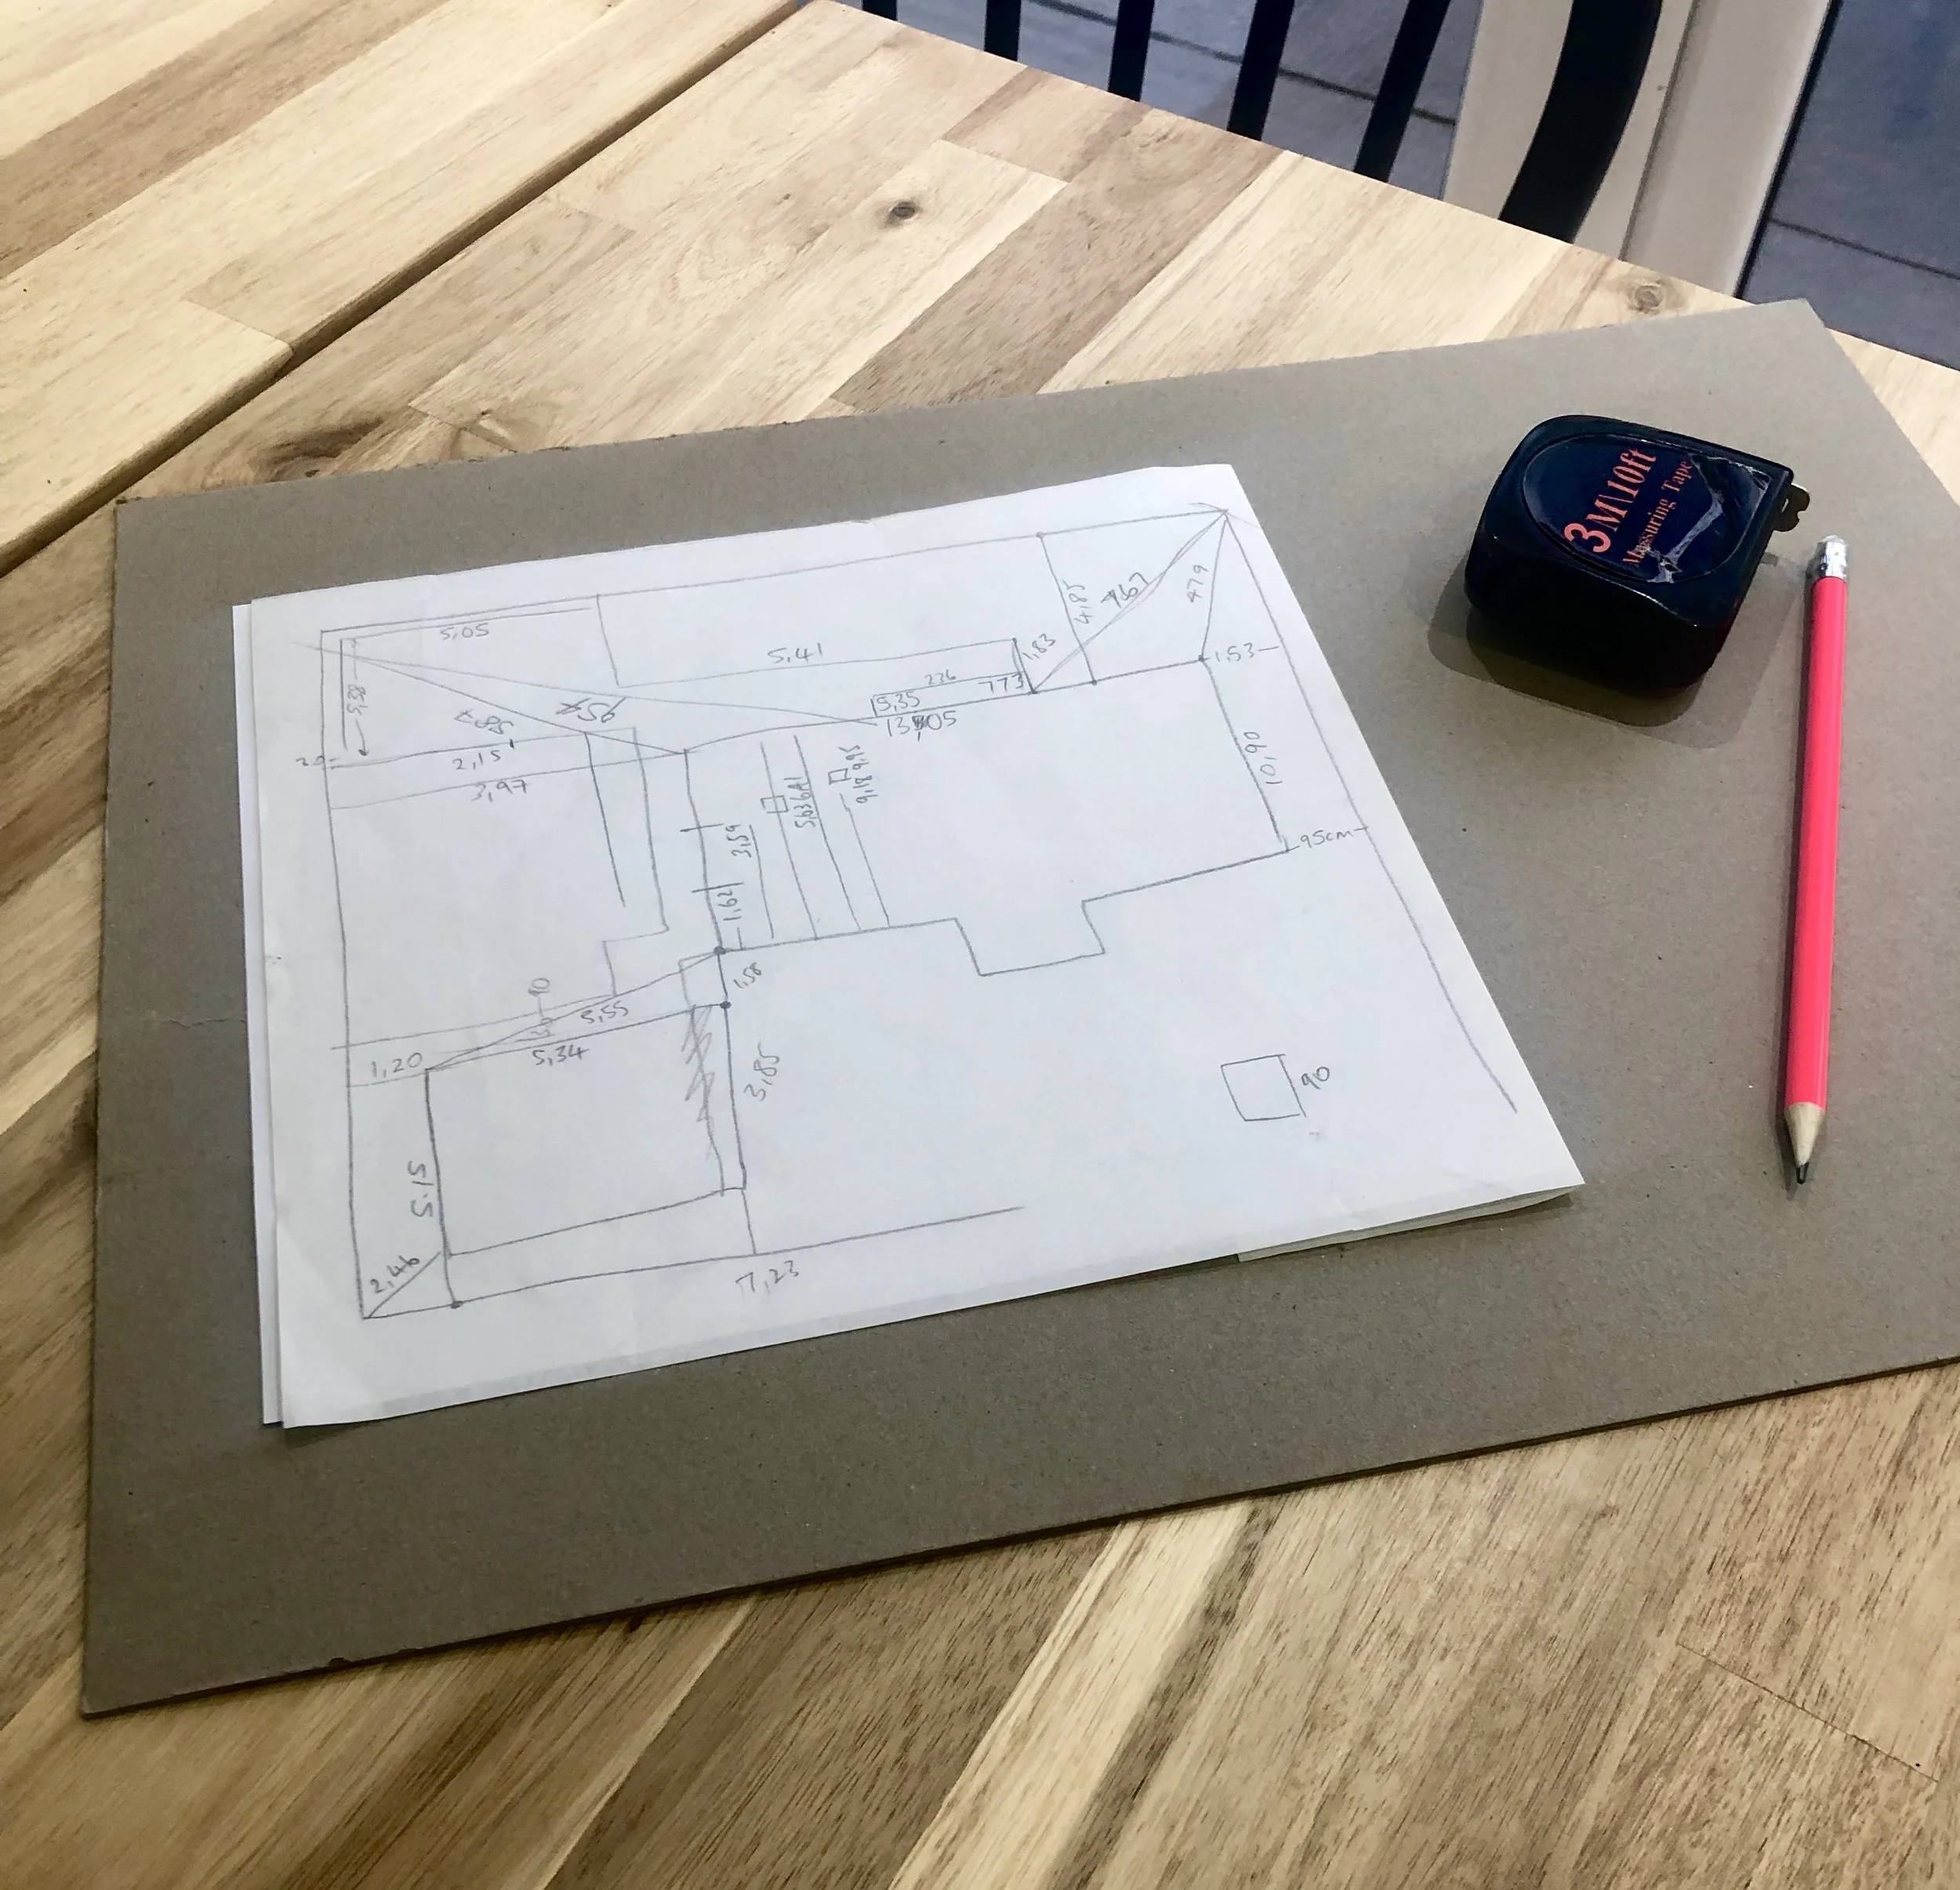
Roughly draw your garden out to have a plan to add all your measurements in some sort of order that you can easily read at a later date. You don’t need to measure the long boundary lines if you use the ‘triangulation’ method to find the corner points. Then you just join the dots.
2. Triangulate!
Don’t go away. I know this word sends a shudder down most peoples spine, but the easiest way to draw irregular shapes without measuring every angle to the nth degree, is to break the garden down into triangles. This way you can find points where lines cross and then joint the dots to create the shape. I measured corner to corner from the house to the edge of the boundary lines in two different places to find the outer corners of the fence. Then I just drew the line to connect these corners together to create the fence line. There are so many You Tube videos explaining how this works so I’ll pass on trying to explain this any further, sorry. As soon as the penny has dropped and you get how triangulation works, it’s actually very easy. All I needed were the measurements on this rough sketch above and I was ready to start the scale plan
2. Use plain paper
Do not use anything with grids, lines or squares as you will want to draw nice perfect squares and right angles on the page, and life just isn’t perfect like that when it comes to garden plots.
The only photo I have of my scale rule from an interior workshop I attended last year. They’re multi sided rulers with every possible scale you could need. They’re game changing for drawing anything - honestly easy to use after a few goes.
3. Use a scale rule - the only way to get anything huge in real life down on to a piece of paper is to apply a scale For example, if you scale down to 1/10th then every 1cm you draw on a piece of paper represents 10cm in real life, also known as 1:10. Your scale needs to be small enough to get it on a piece of paper, but large enough to draw detail clearly. We were all recommended to use 1:50 or 1:20 scale. I learnt not to question our teacher again after the software topic.
4. Pencil first, then pen
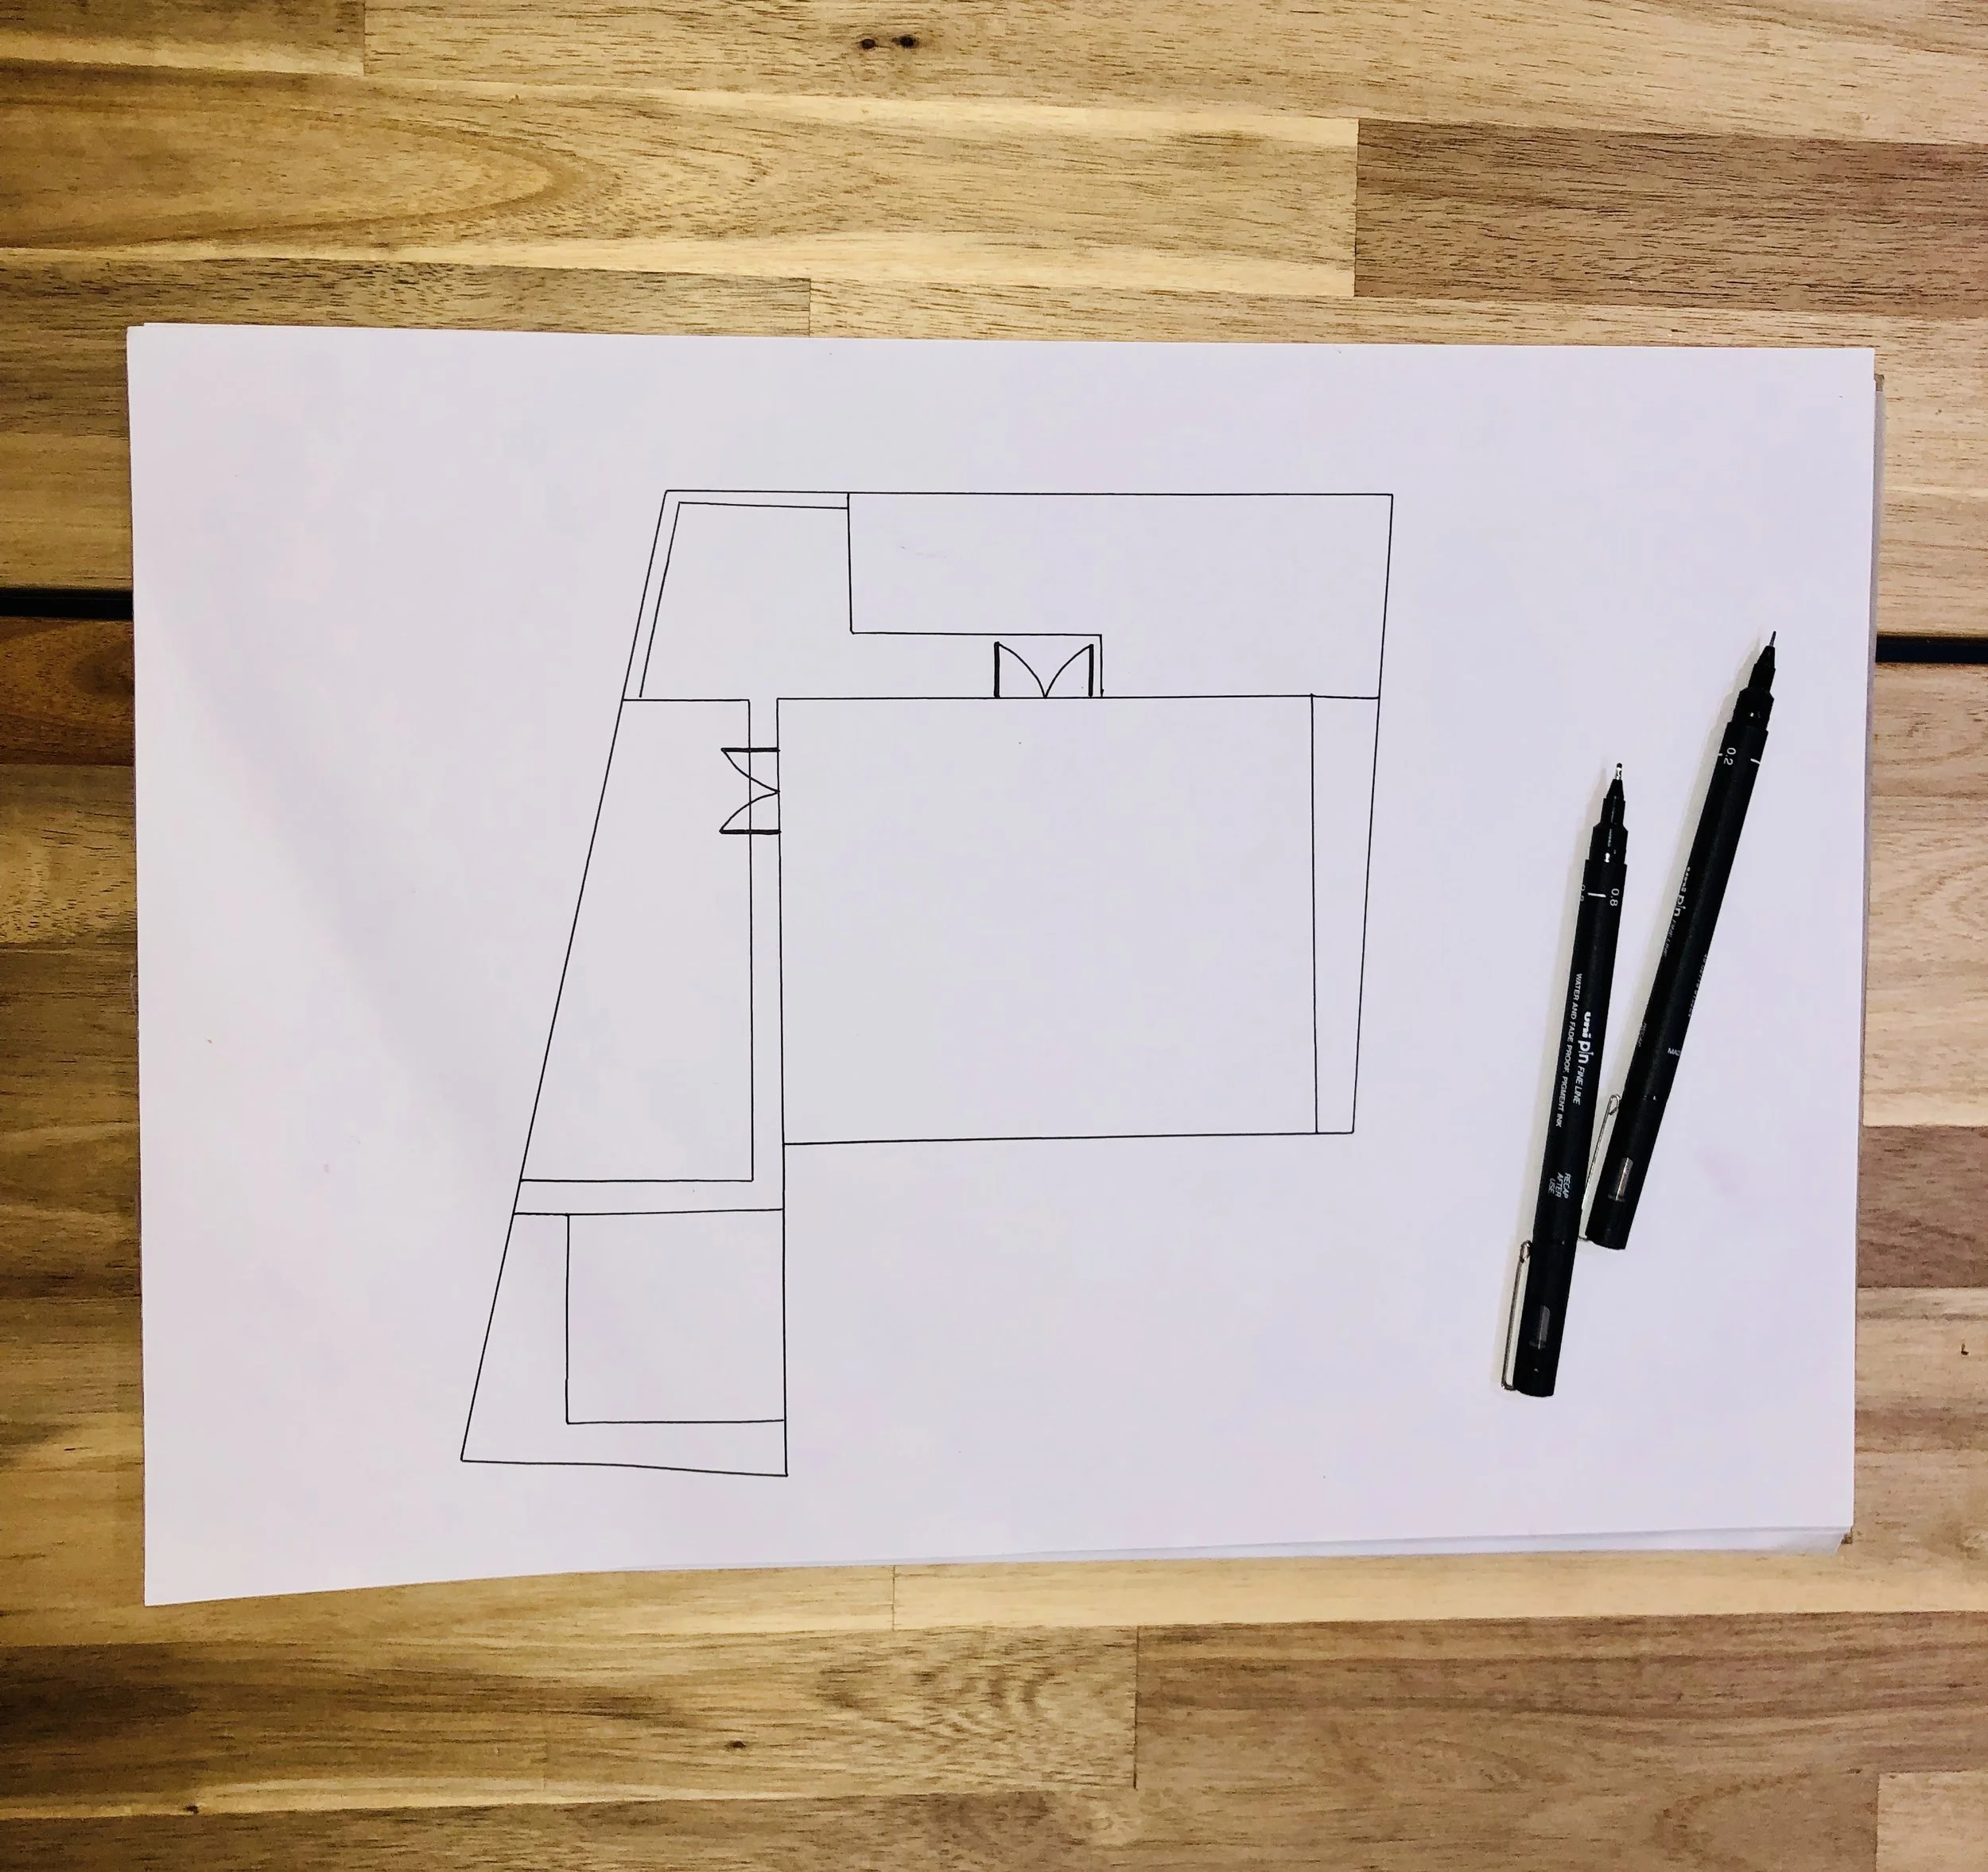
Using my fancy scale ruler, I took the measurements I collected and drew the outline of our plot and garden. You can see we don’t have any right angles here and it’s an incredibly narrow wrap around garden - which is the whole reason I went on the Garden Design Course as I needed to learn every design trick possible to create features and interest in this limited and boring shape.
5. Understand what you’ve got before you start designing
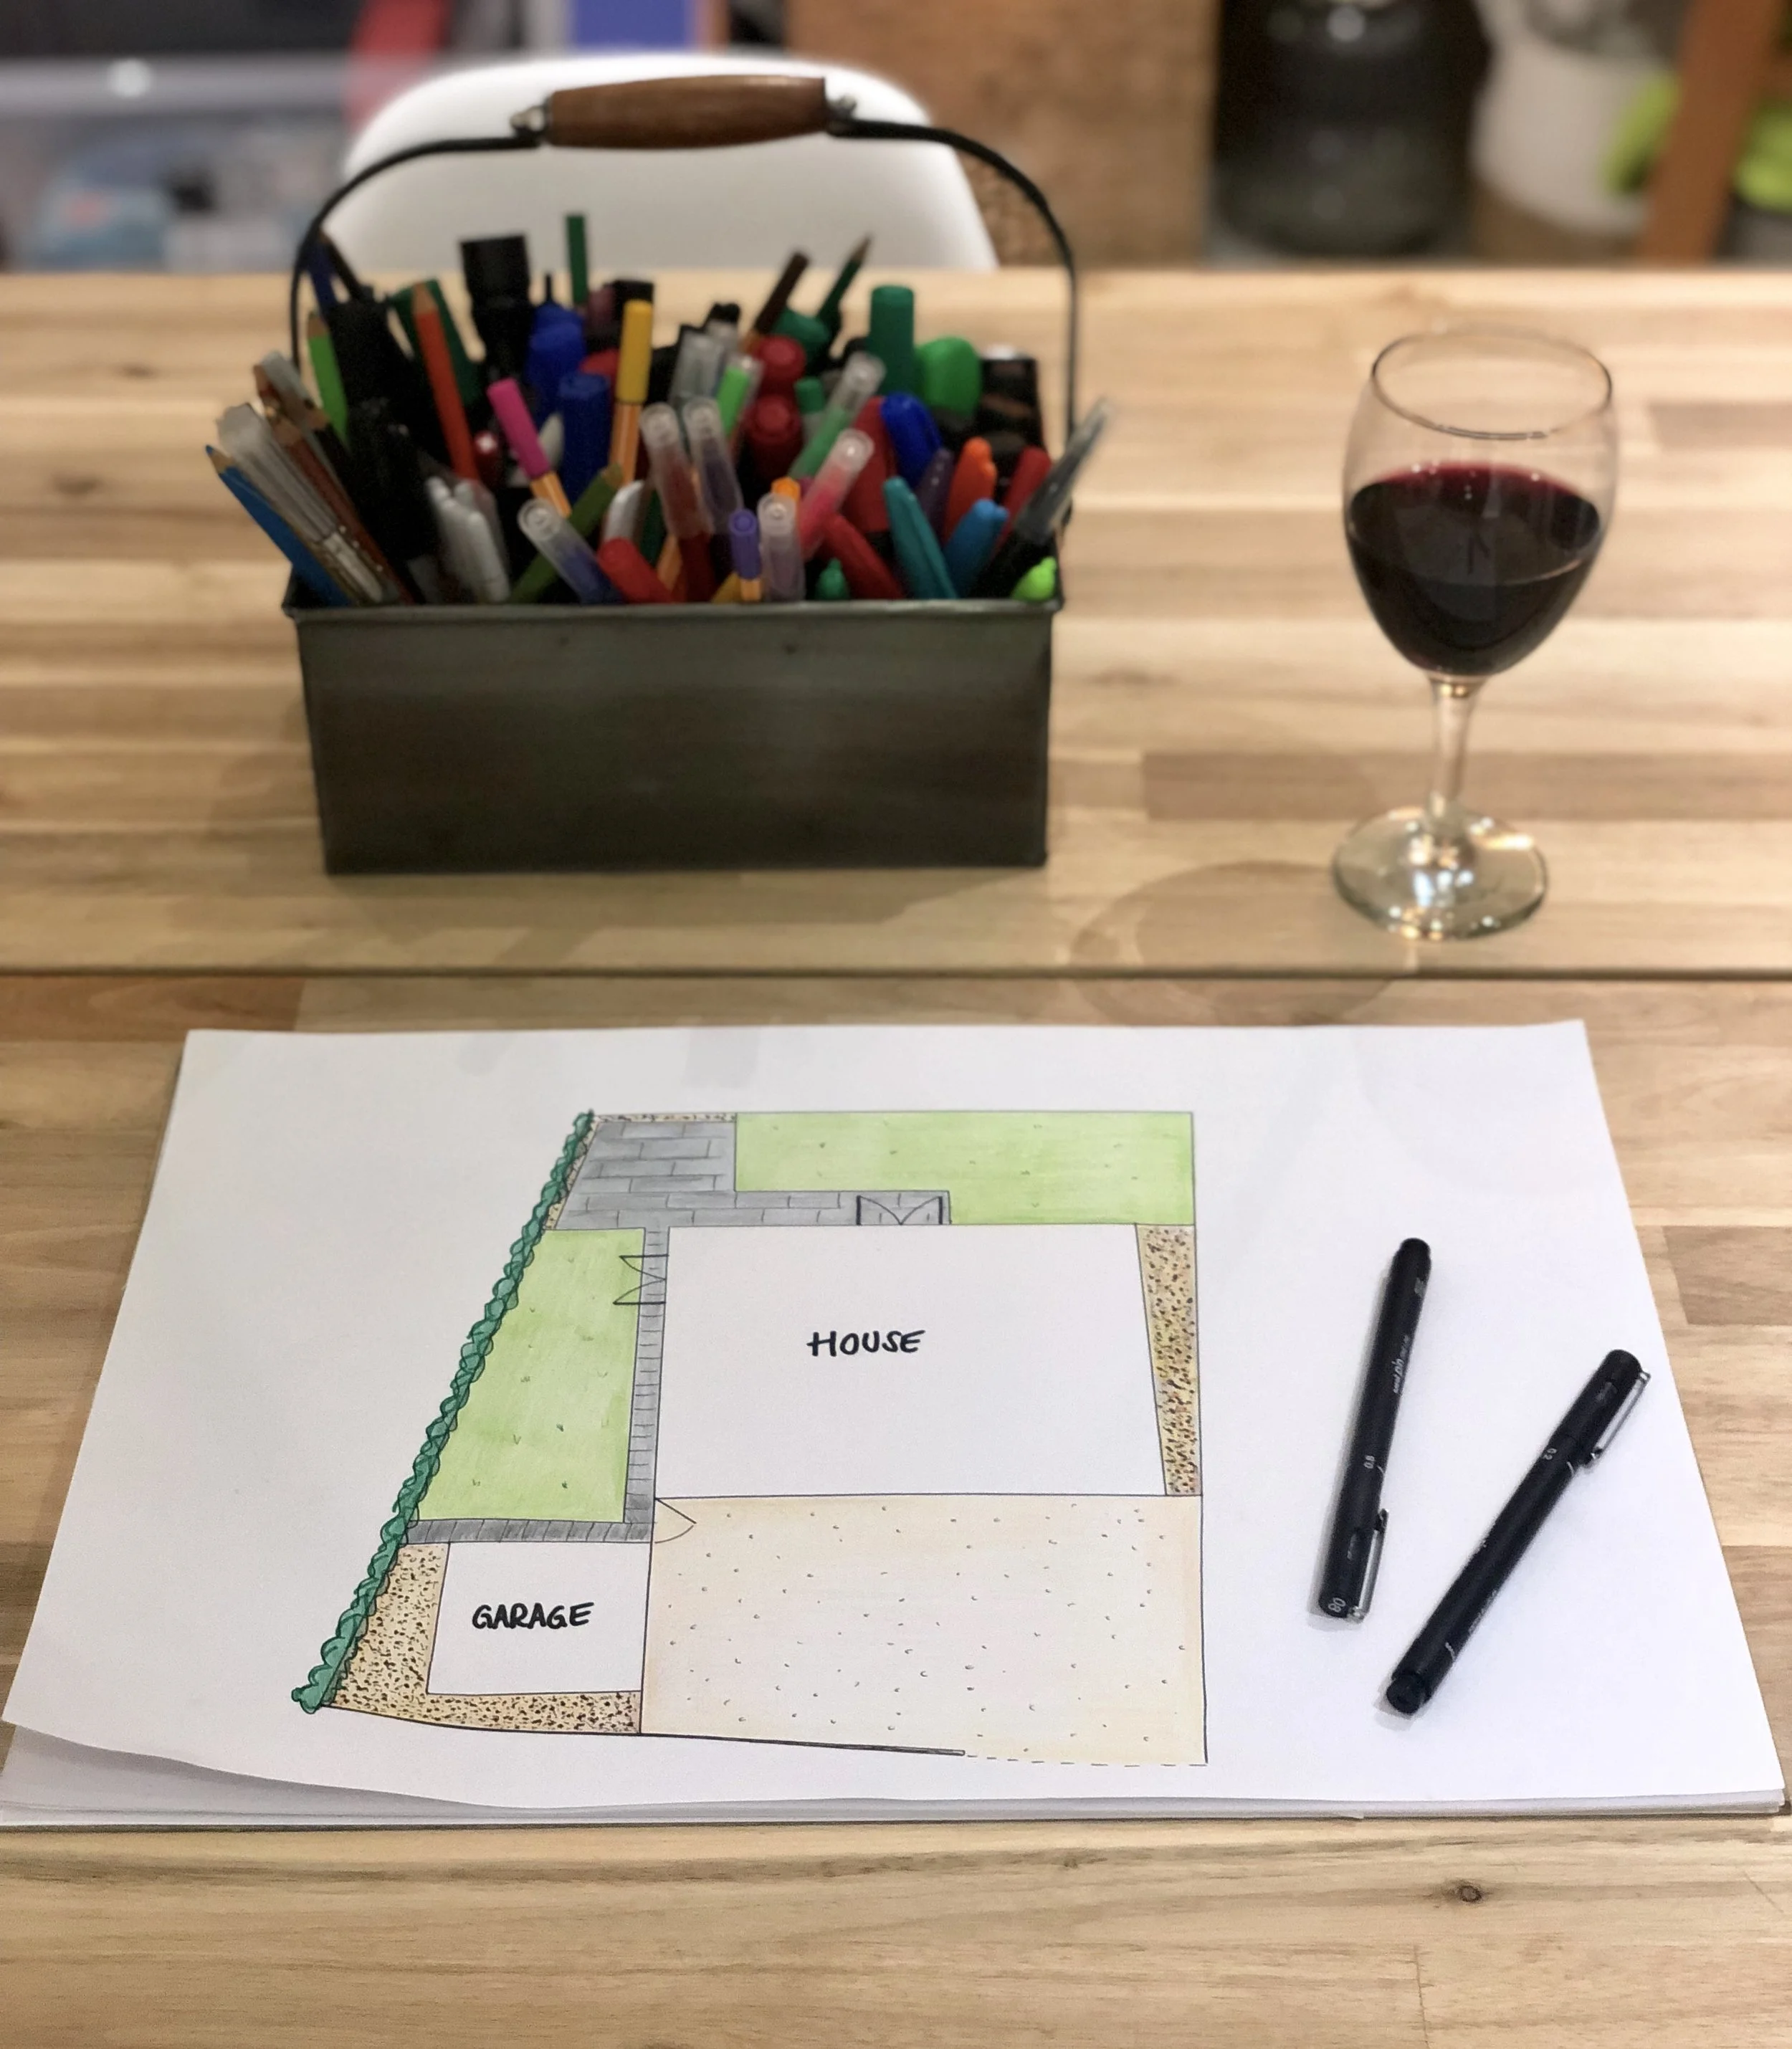
It helped me to complete a scaled site plan of our garden before we started any work. Admittedly I got carried away colouring in the grass and paving, but it was the best ‘BEFORE’ shot I was ever going to get that joined together the three separate areas of the garden to help me see the entire space and start work.
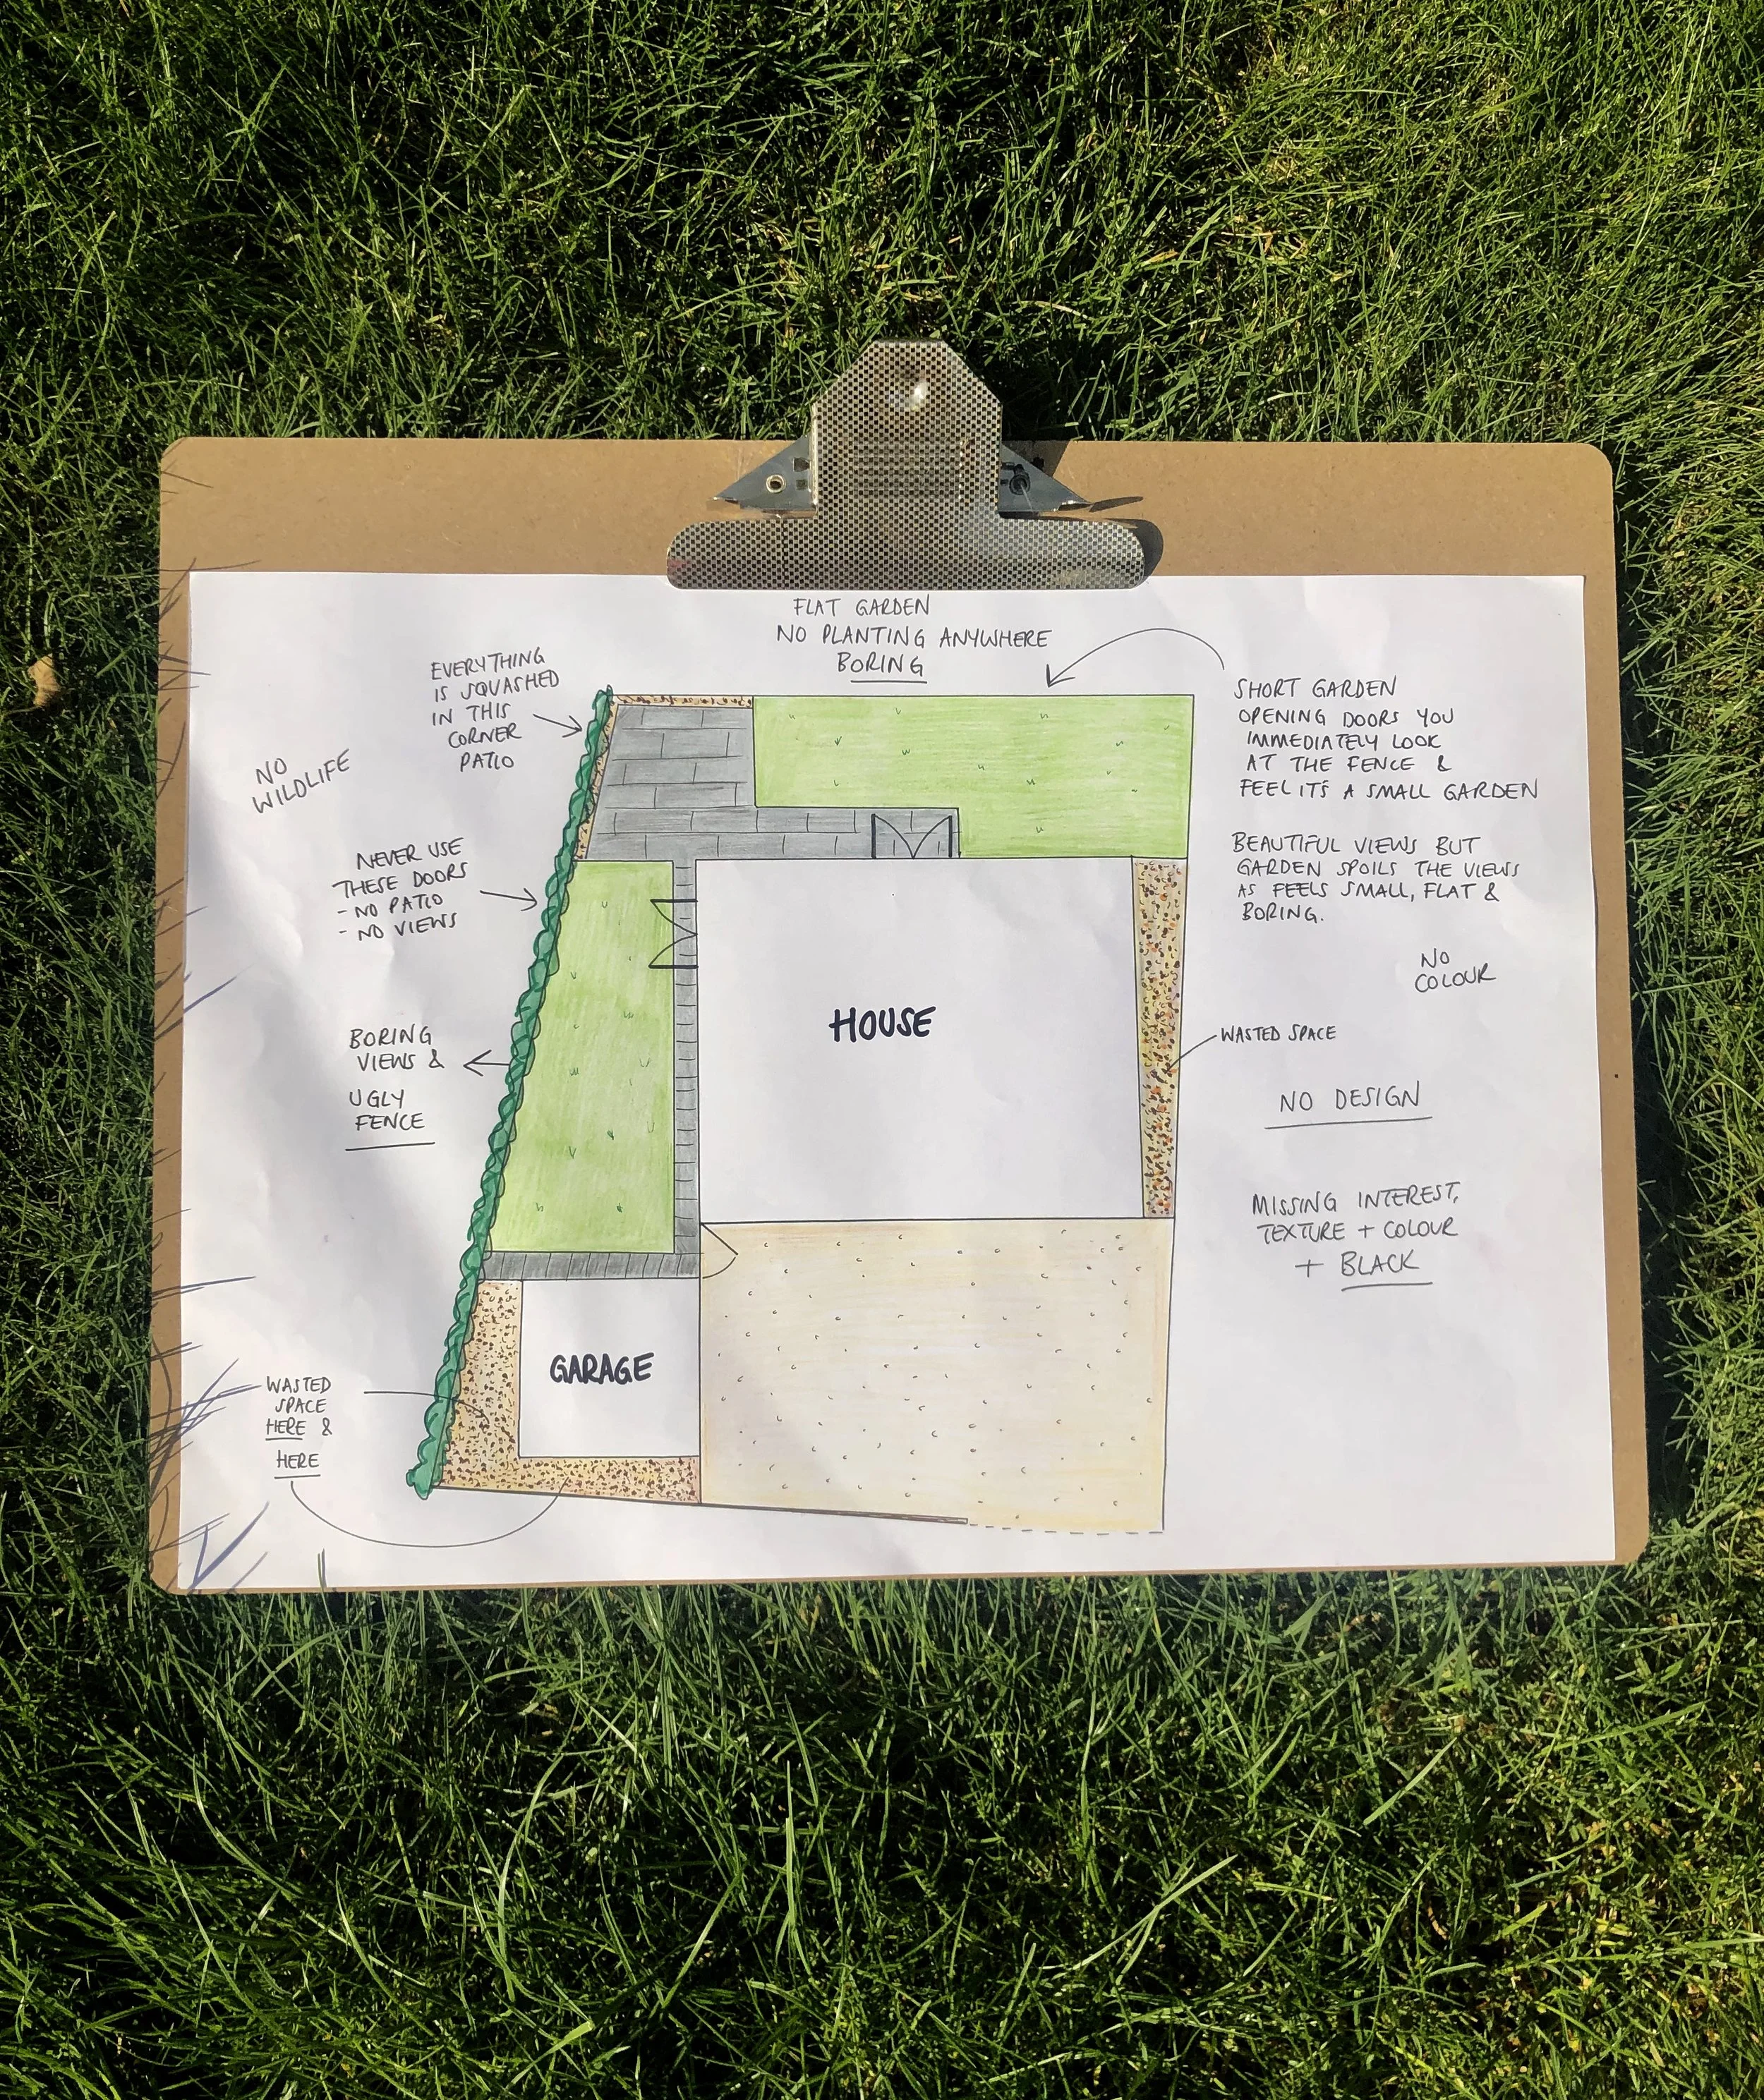
6. Critique your garden, on your plan
This ‘BEFORE’ plan that I drew to scale helped me to capture everything I didn’t like about our garden. It was flat and it was short. As soon as we open the patio doors we look straight at the fence in front and it feels like a tiny garden. The other set of patio doors are never used as it opens straight onto grass. The views out of this door looked straight at a huge stretch of fence and leylandii. There is no interest, no planting, no texture and no colour. And we only ever used the corner patio and always felt squashed trying to lounge, dine and BBQ all in this tiny area. I had a lot to learn about what to do with this space!
The fun really started in Week 3 when we learnt the principles of Garden Design!
Coming soon in a blog, promise!
x


I learnt two big things in our second lesson: 1. A scale plan is not just for the Pros. To get the best design, you need a plan on paper which clearly shows all spaces, sizes, shapes, proportions and most important of all - the angles! Never assume a garden has right angles…